Halloween Reverse Dye Shirt
Get ready for spooky season with a thrifty project that’s tie-die for

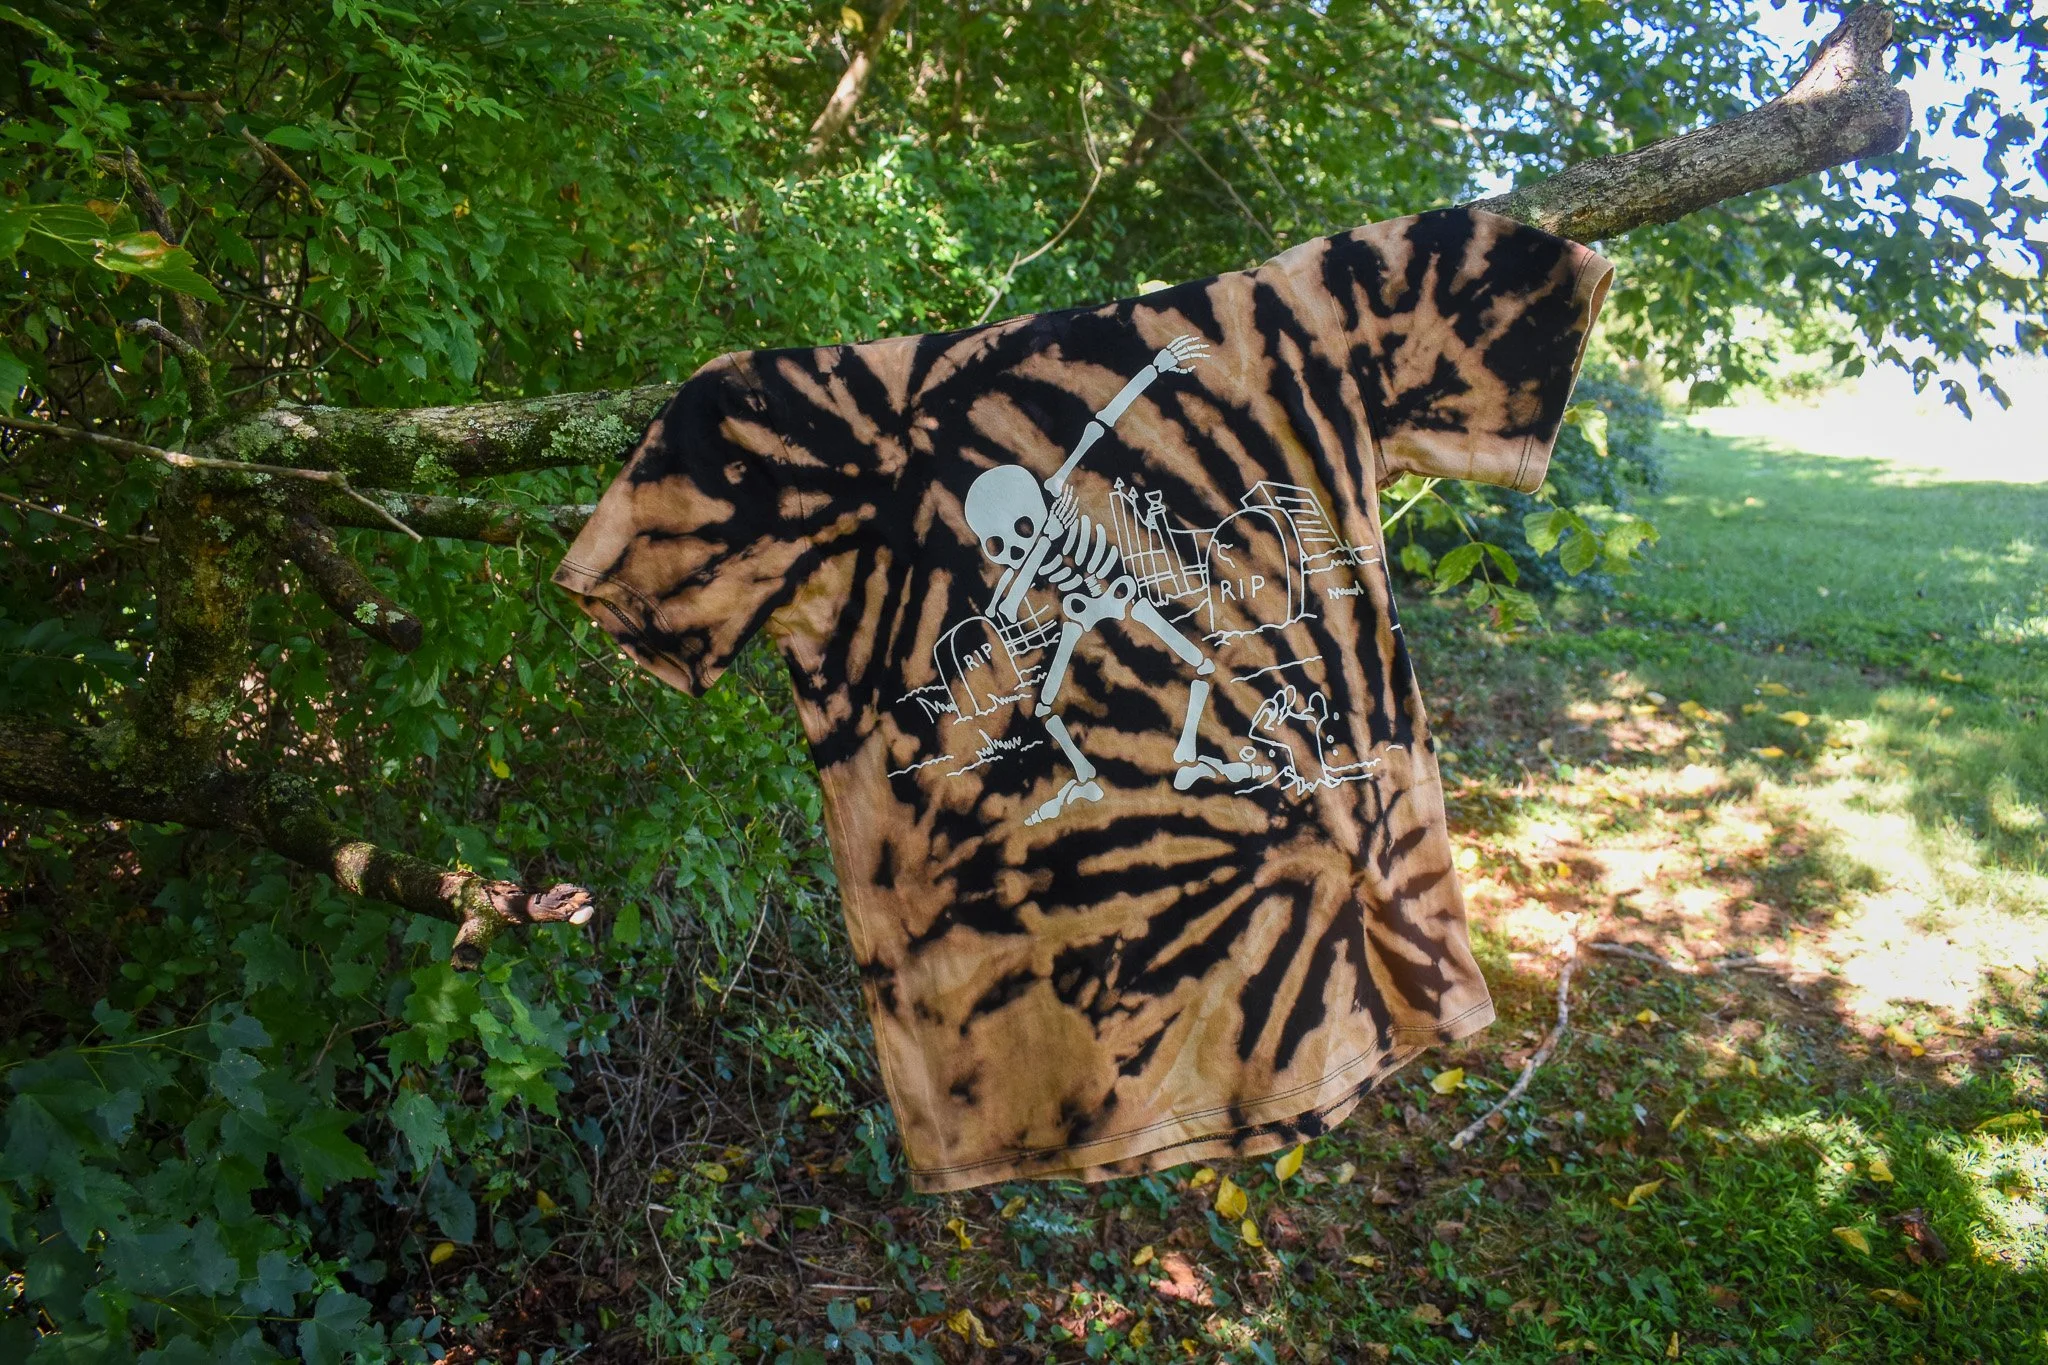
We love thrifting for Halloween goodies as a way to reduce waste and save money on holiday projects. Because Halloween comes but once a year, themed shirts are often an easy find in second-hand shops, especially in the children’s section. I found this dabbing skeleton shirt at a local thrift haunt and gave it new life with a reverse dye treatment by removing the pigment from the shirt using bleach. This project is faster than traditional tie dye (no waiting overnight for a reveal!) making it a great Summerween afternoon craft.
Materials:
Colored 100% cotton t-shirt
Bleach
Rubber bands
Water
Spray bottle
Hydrogen peroxide - 3%
Bucket
Rubber gloves
Timer
Fork
Important notes:
adhere to safety precautions for working with bleach listed on the manufacturer’s label
work outdoors or in a well ventilated area
wear clothing that you don’t mind getting discolored in case it comes in contact with the bleach
test a small area of the shirt to determine the reaction as it may vary based on the type of dye used on the shirt originally or the fabric type if a thrifted find is missing its label

Step 1: Acquire a cotton shirt and give it a wash prior to beginning the project. The material is important as synthetic fabric will not react in the same way as natural fiber.
Step 2: Assemble all materials and prepare a work area.
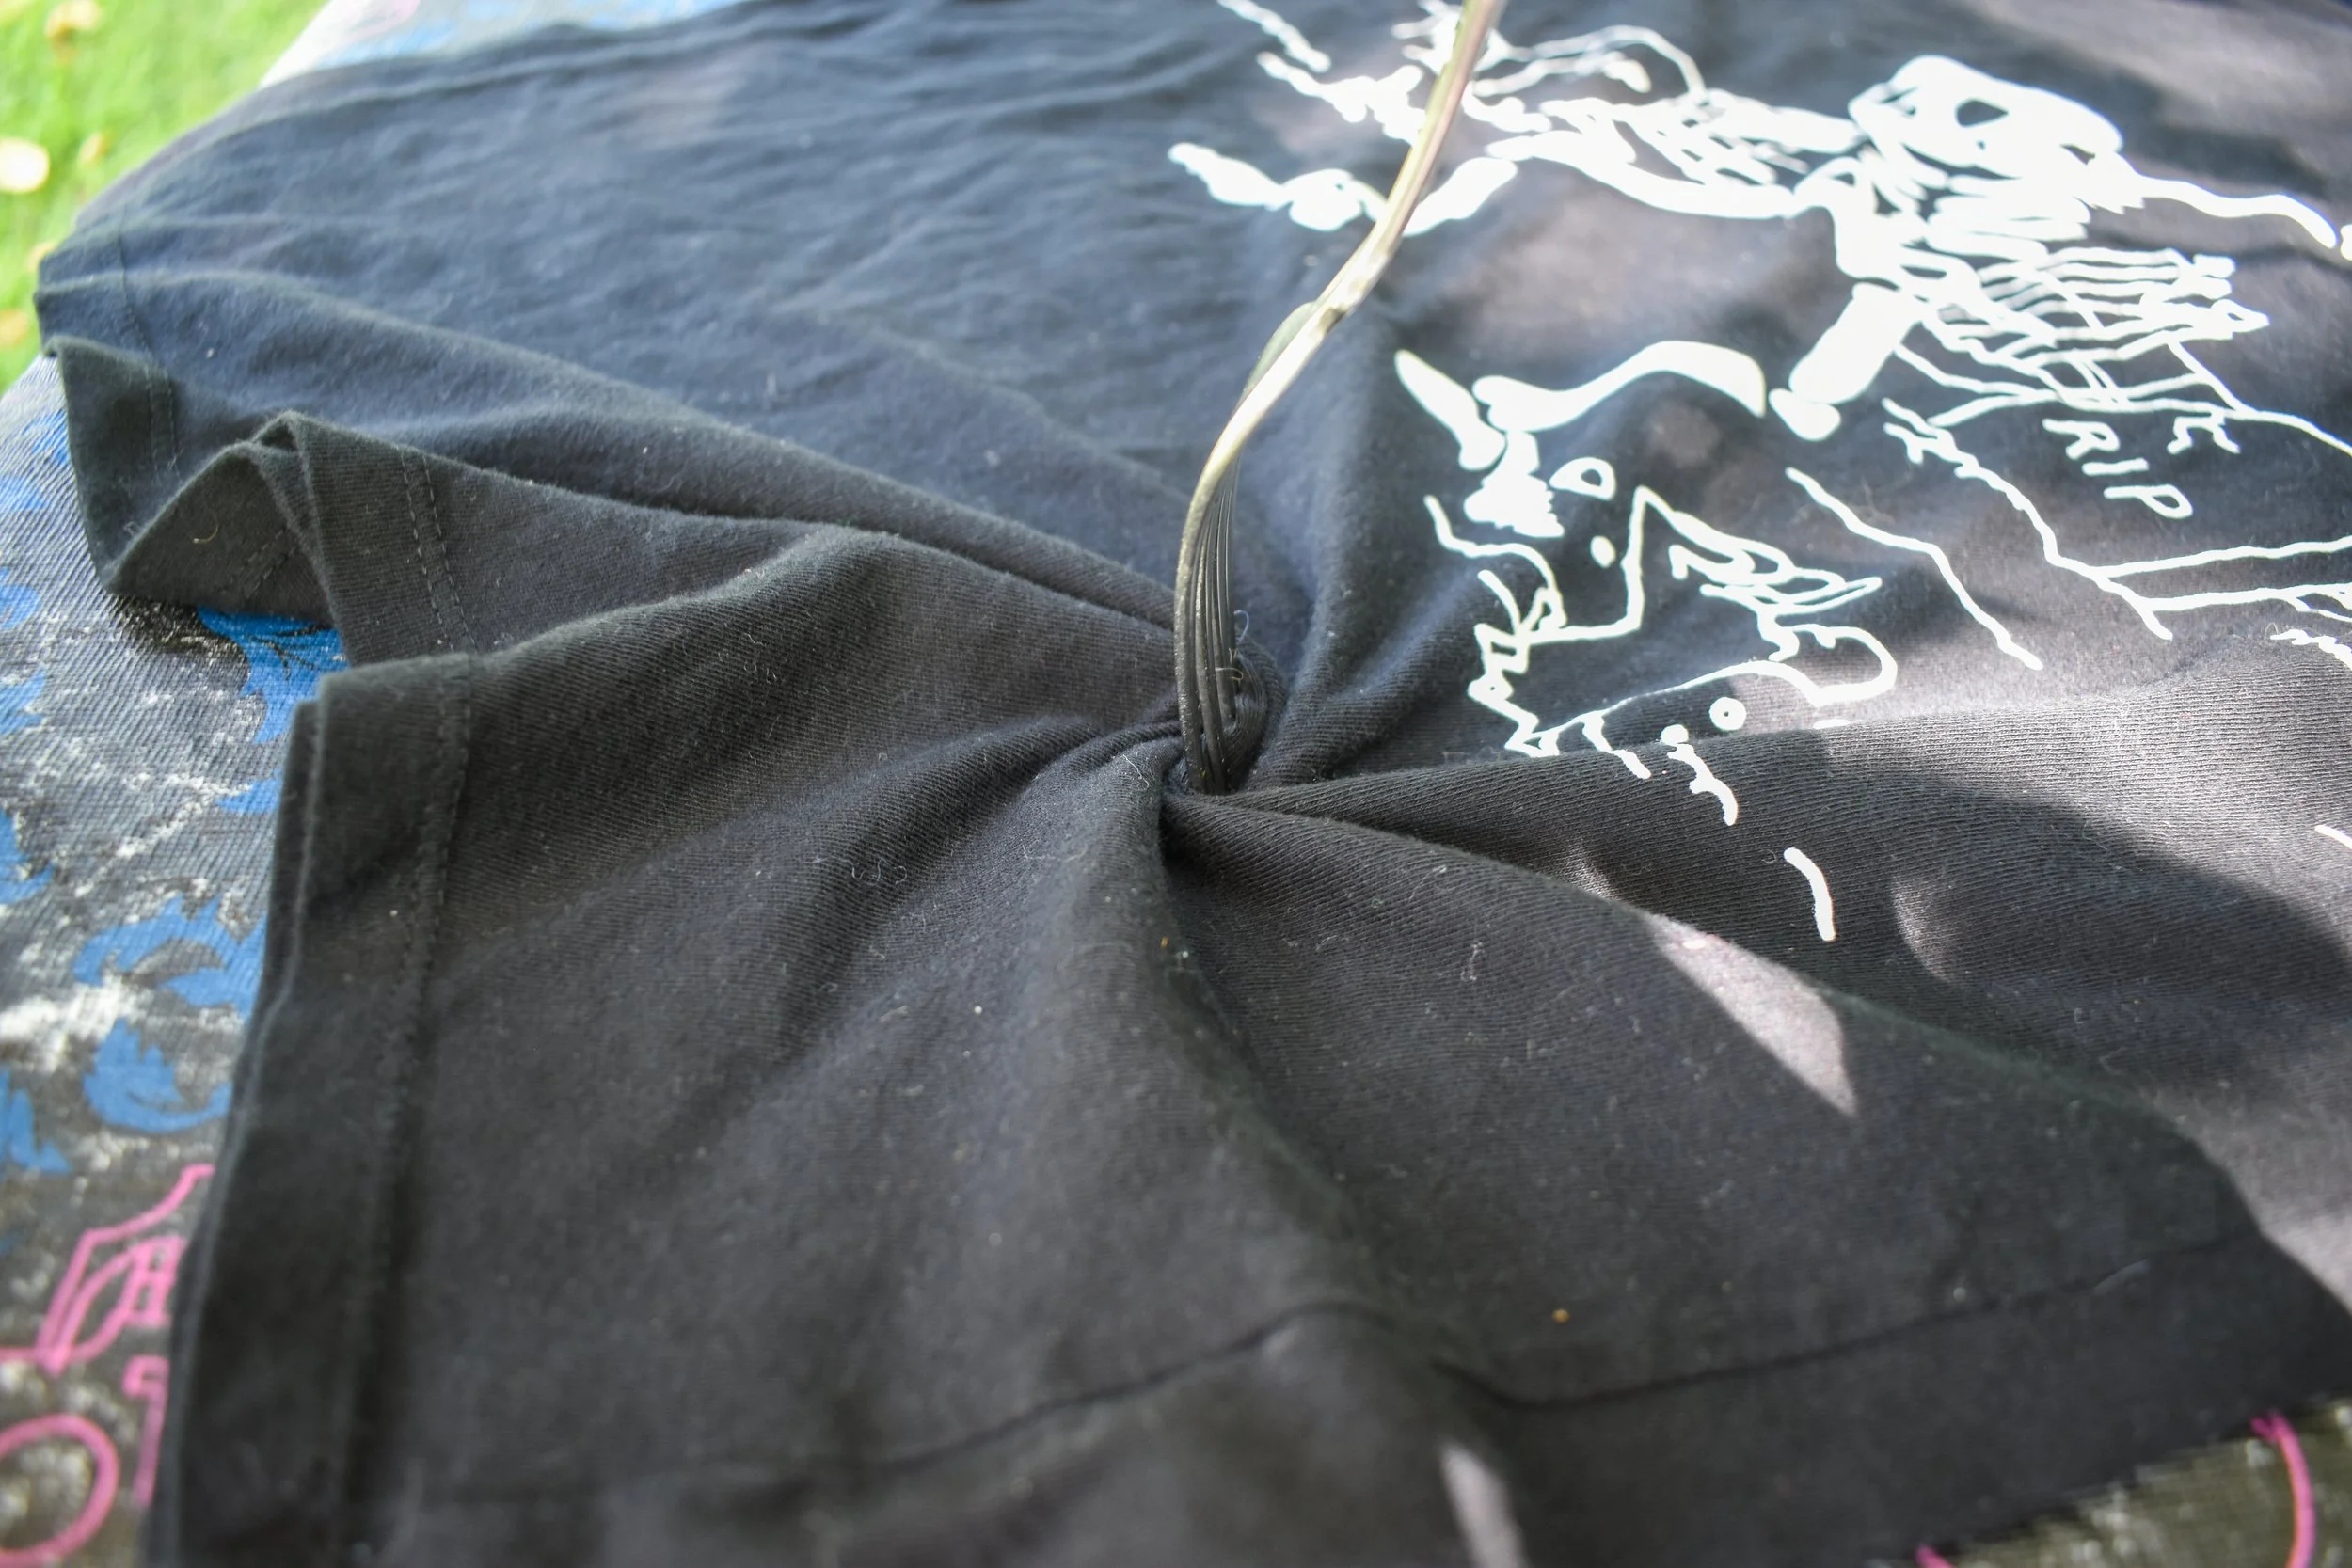
Step 3: Begin to fold the shirt into the design. Dampening the shirt first can help fold the shirt into the desired pattern more easily, but for this design, we worked with a dry shirt. We created one spiral in the bottom right side of the shirt and another spiral in the upper left side of the shirt using a fork to help keep the swirl tight.
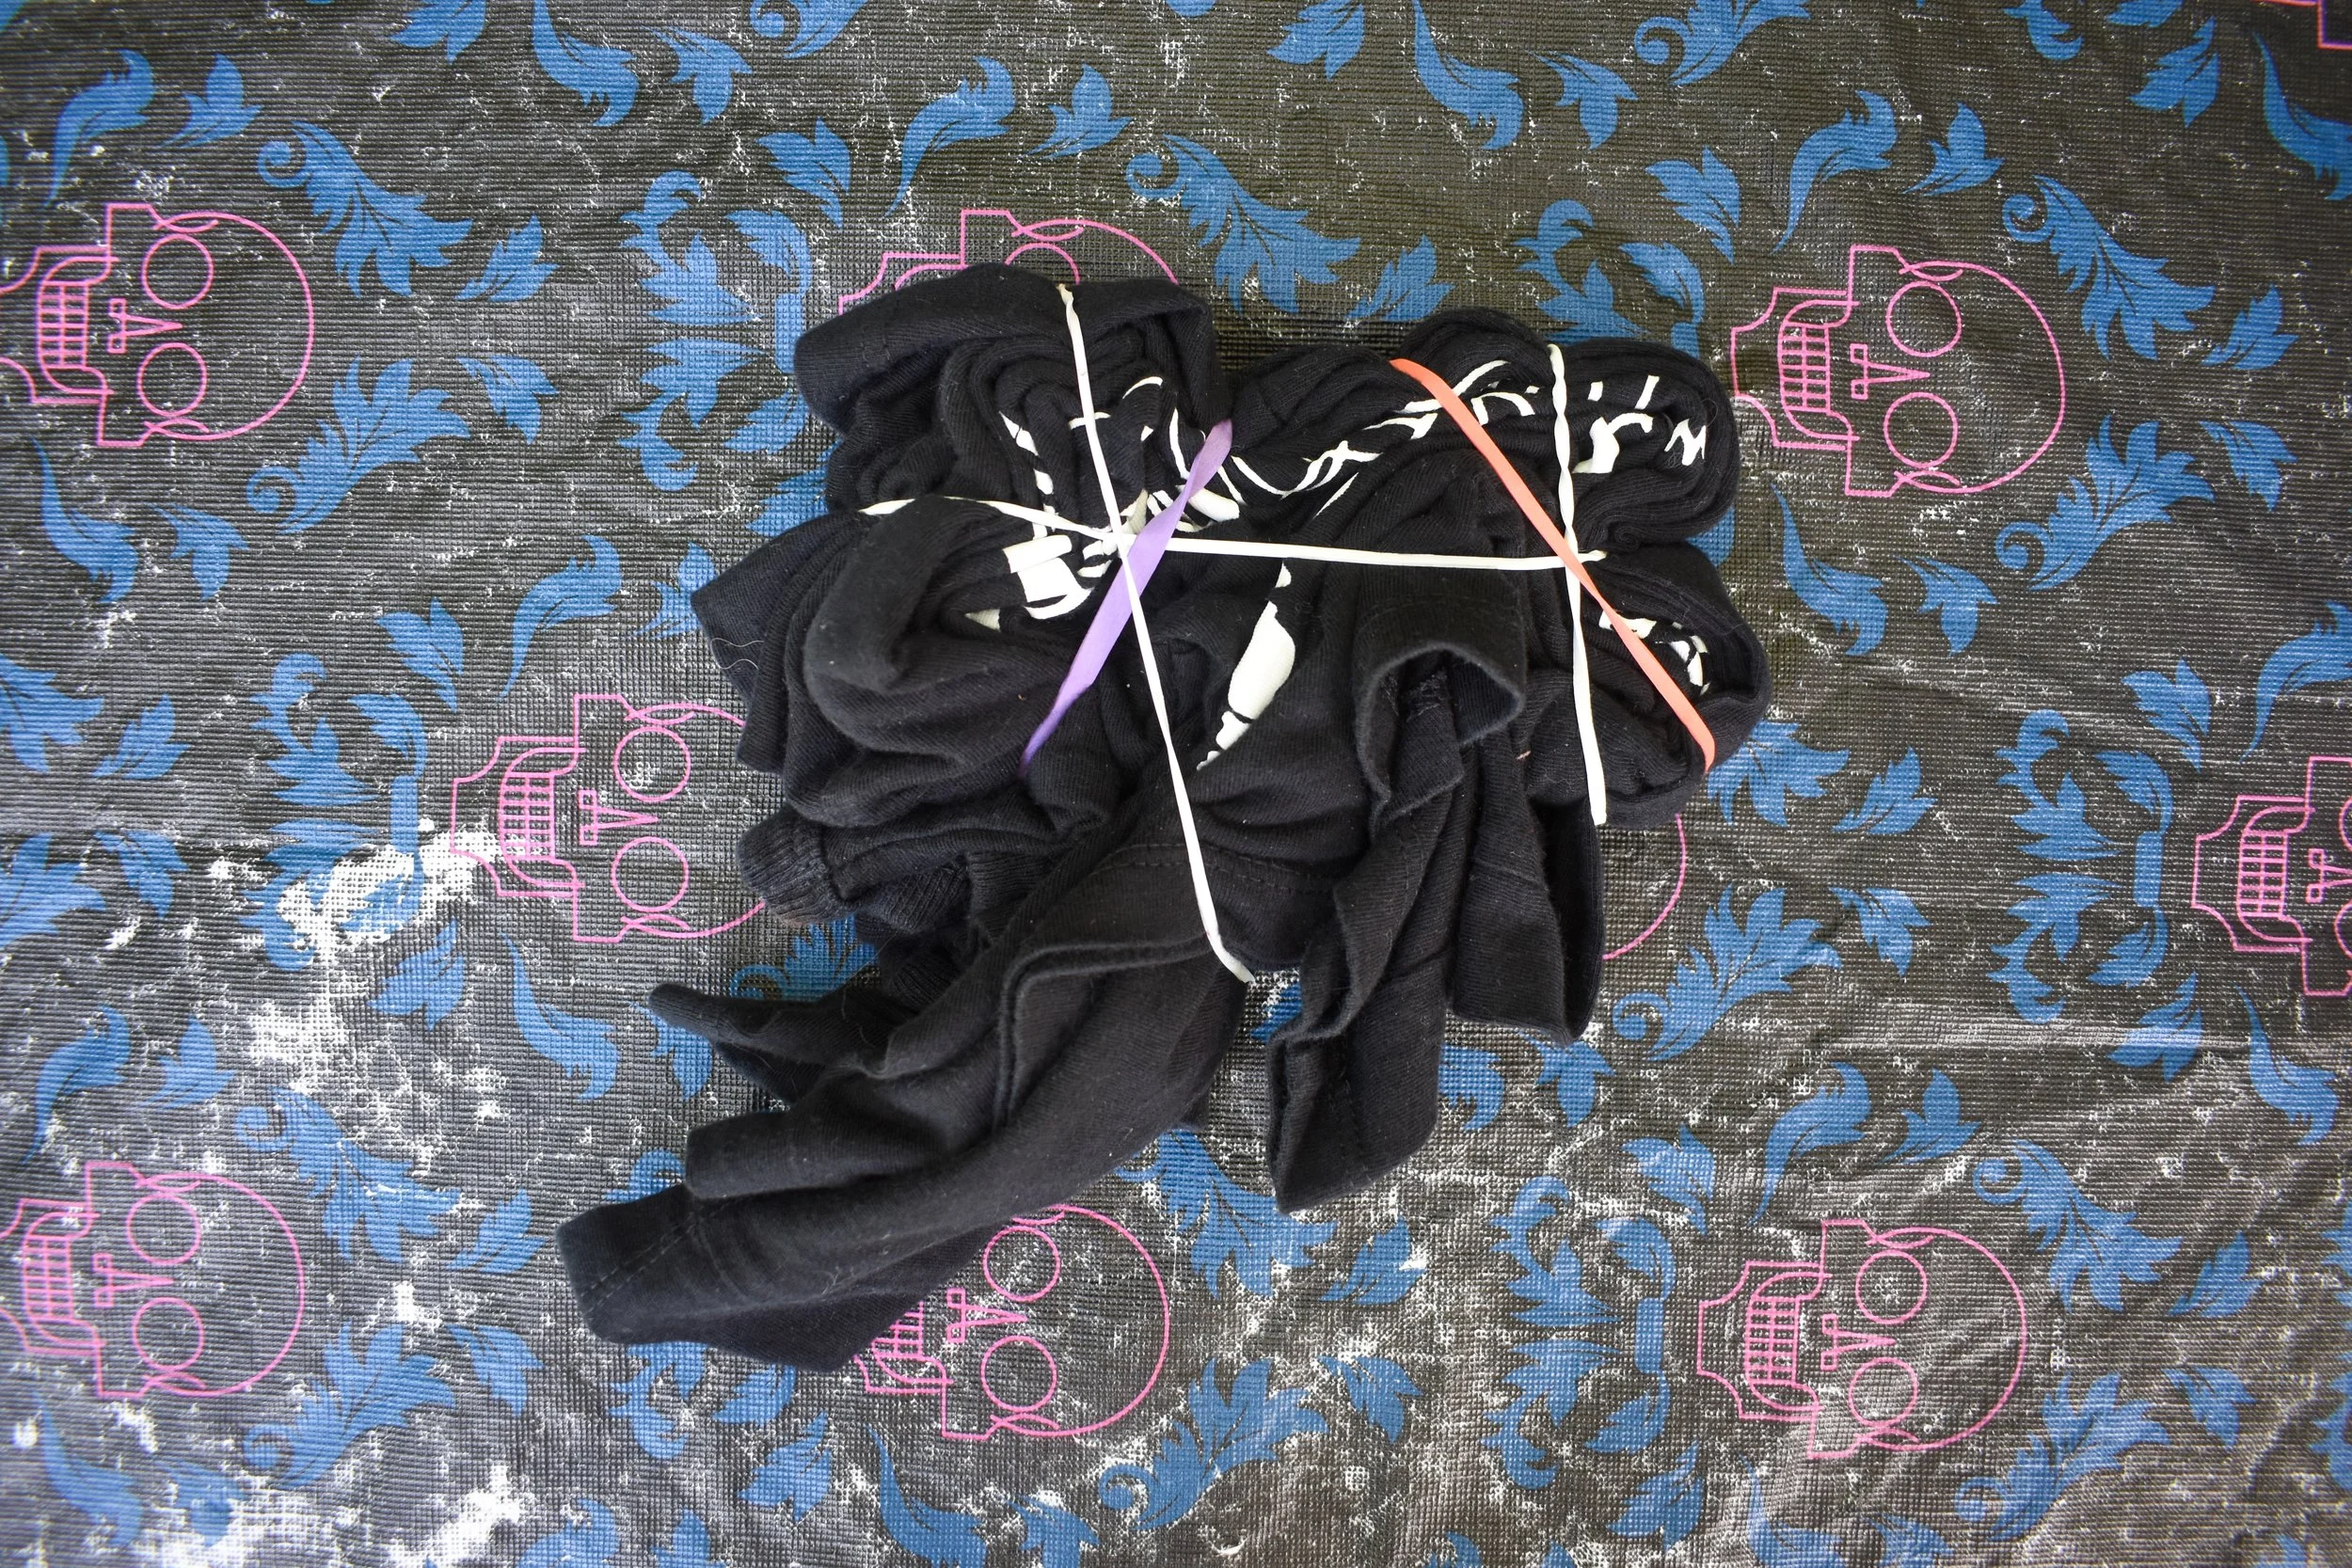
Step 4: Use rubber bands to secure the spiraled shirt design in place. The tighter the folds and bands, the less opportunity there will be for the bleach to penetrate it leaving more of the original color intact and making the pattern more distinct. If more negative or bleached space is desired, leave the design looser.
Step 5: Put on gloves. Add a 1:1 ratio of bleach and cool water to a spray bottle. Diluting the bleach is imperative to avoid damaging the fibers of the shirt.
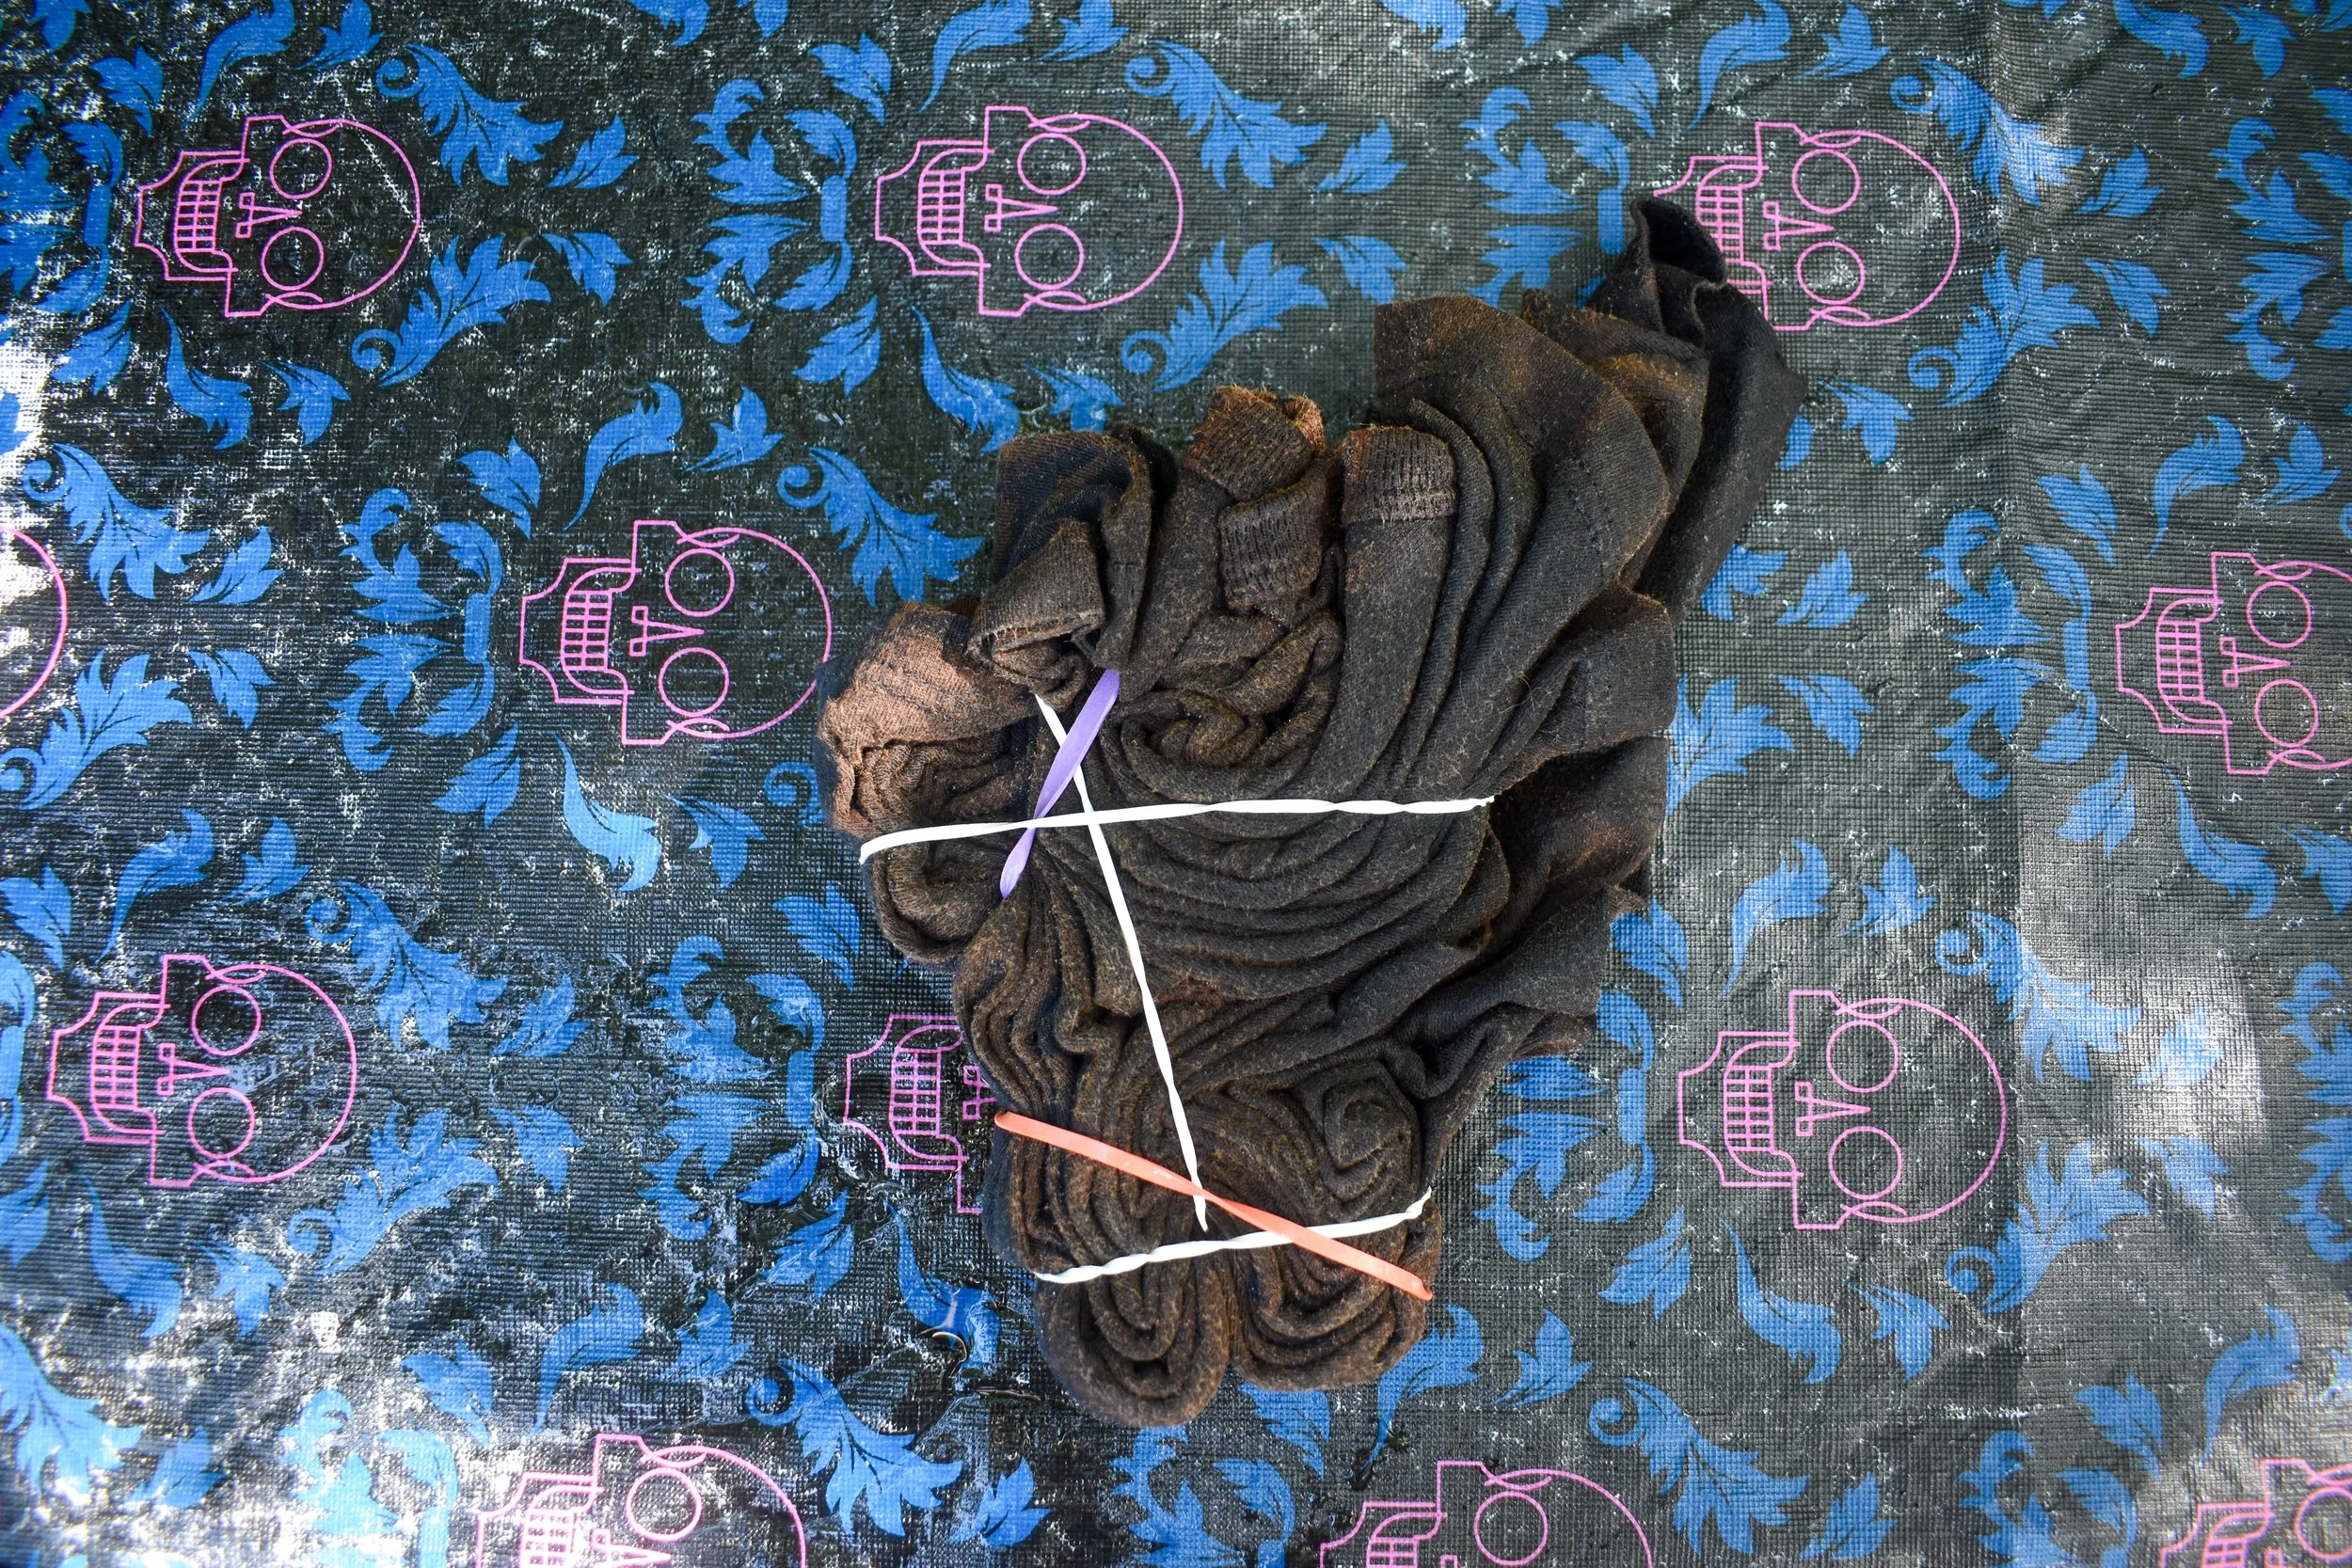
Step 6: Spray the front and back sides of shirt with the diluted bleach. Set a timer for 5 minutes. Let the shirt soak for a minimum of 5 minutes or maximum of 20 minutes. The time will vary as it is dependent on how saturated the shirt is, the shirt’s original fabric and dye composition, and the desired level of fade.

Step 7: While waiting on the color to lift from the shirt, prepare a neutralizing bath by mixing 1 cup of hydrogen peroxide with 1 gallon of cool water in a bucket. This step serves to stop the bleach reaction and prevents holes from developing in the shirt due to prolonged exposure to bleach.

Step 8: Once the shirt is sufficiently bleached, submerge it in the neutralizing bath. Remove the rubber bands to ensure all areas are soaked in the hydrogen peroxide mix.
Step 9: Rinse the shirt further under running water.
Step 10: Wring out any extra water and hang the shirt to air dry.
Step 11: To care for the shirt, wash it separately on its first cycle to avoid any residual bleach from harming other garments. We tend to wash most items on a cold, gentle cycle and air dry often here at the farmhouse to maximize longevity and reduce resource use.

